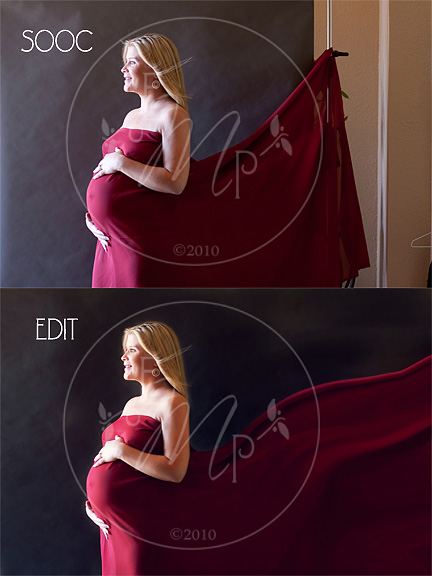
{The Blowing Belly Tutorial} Photoshop Tutorial for Photographers
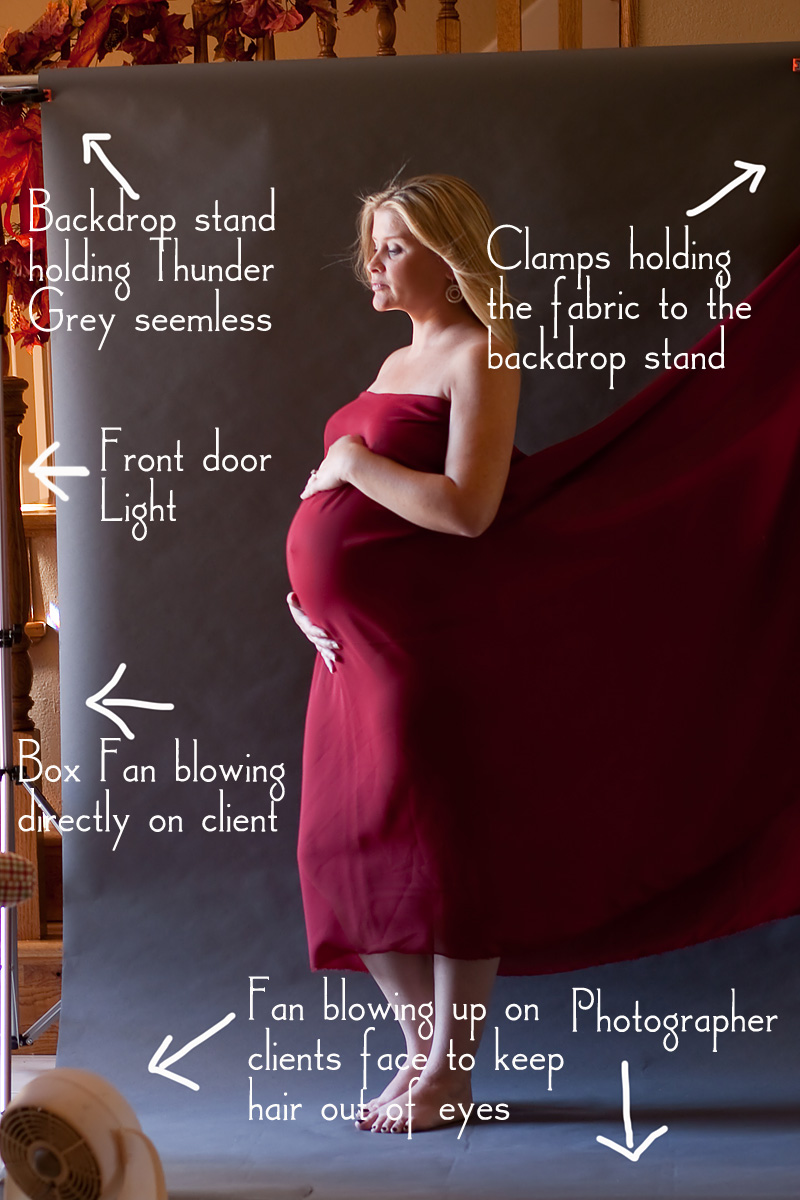
Nothing is more beautiful than a pregnant glowing mama to be. I adore maternity sessions. When I do a studio set up, as demonstrated below, it can be challenging at times to come up with different ways of showing off that beautiful belly. This is one of my favorites. As another photog said, "That is Art!" I agree. It can be a challenging image to finish however, so I thought a quick tutorial might help! First I am going to show you a quick snapshot of the scene pulled back. This will help describe my set up.
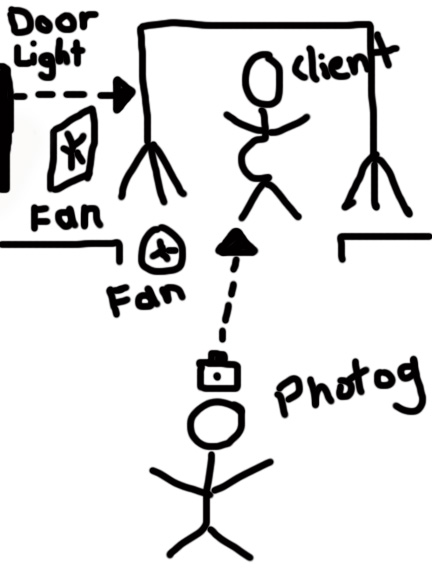
She was standing in her entry way and I was shooting from the living room into the entry way. Our light source was the front door. You can all laugh at my mad drawing skills ;)
For the steps:
1. SOOC (Straight Out of Camera) Please note how the fabric is held up by the clamps. 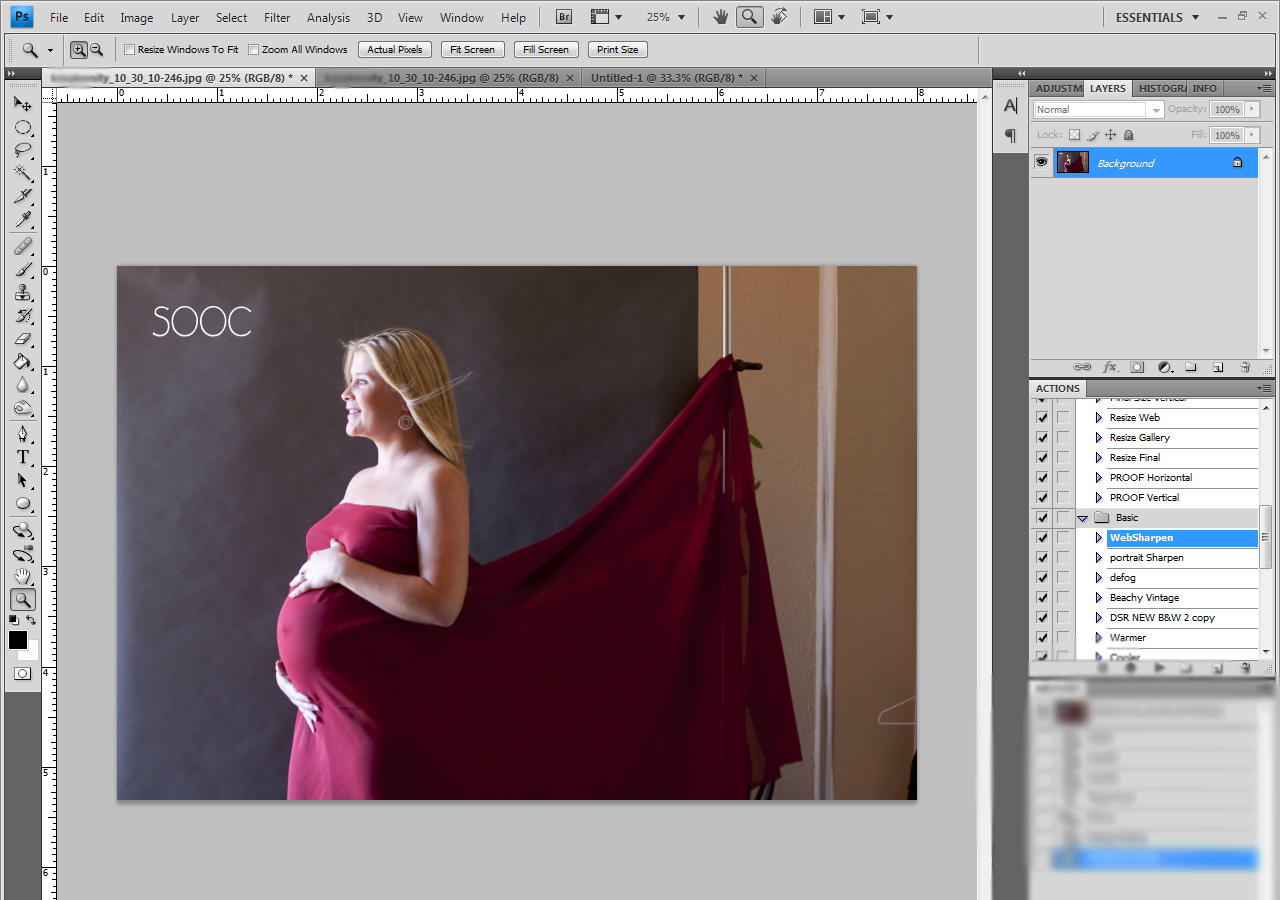
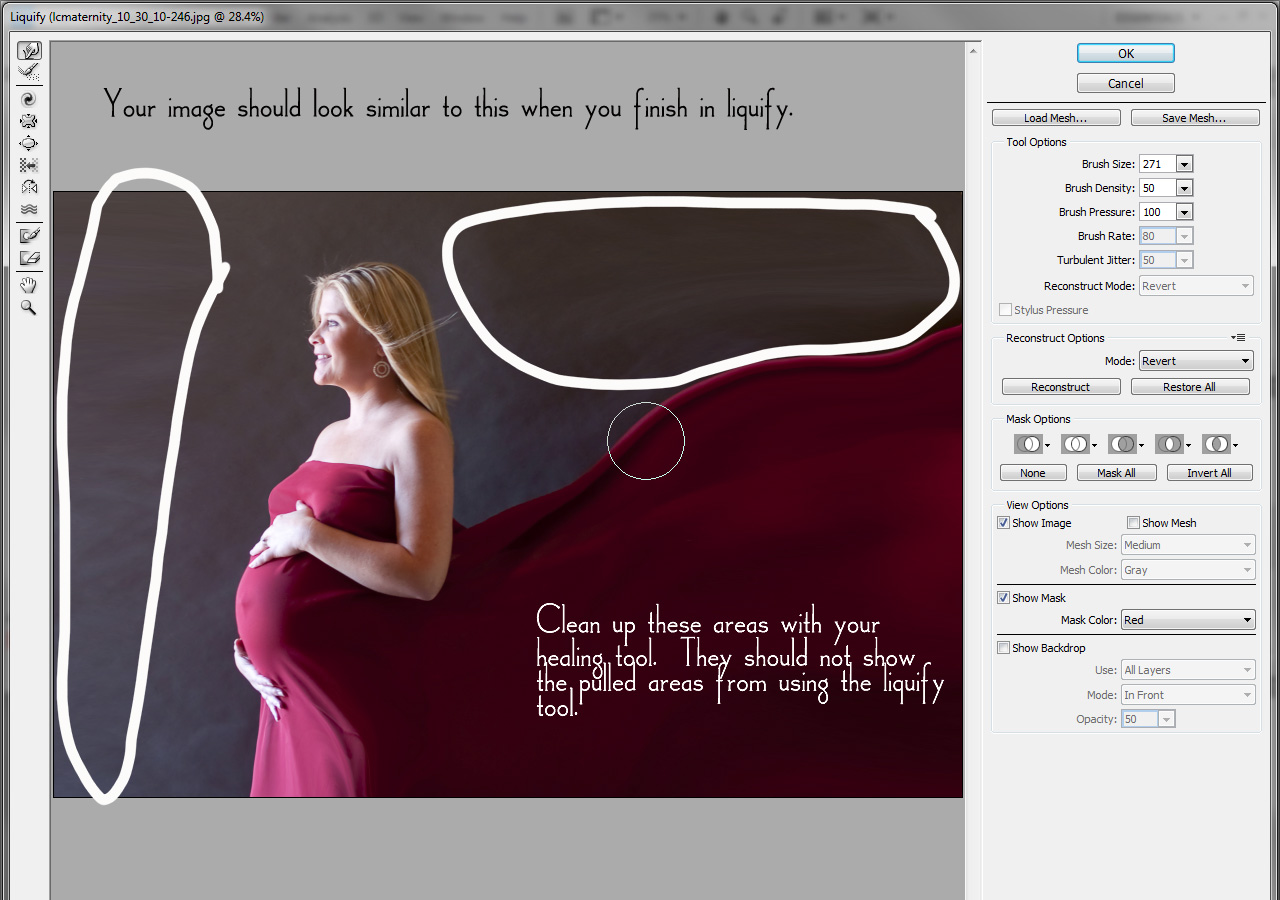
2. Liquify! You can see how big my brush was. I simply pulled the image in the direction it was already flowing. 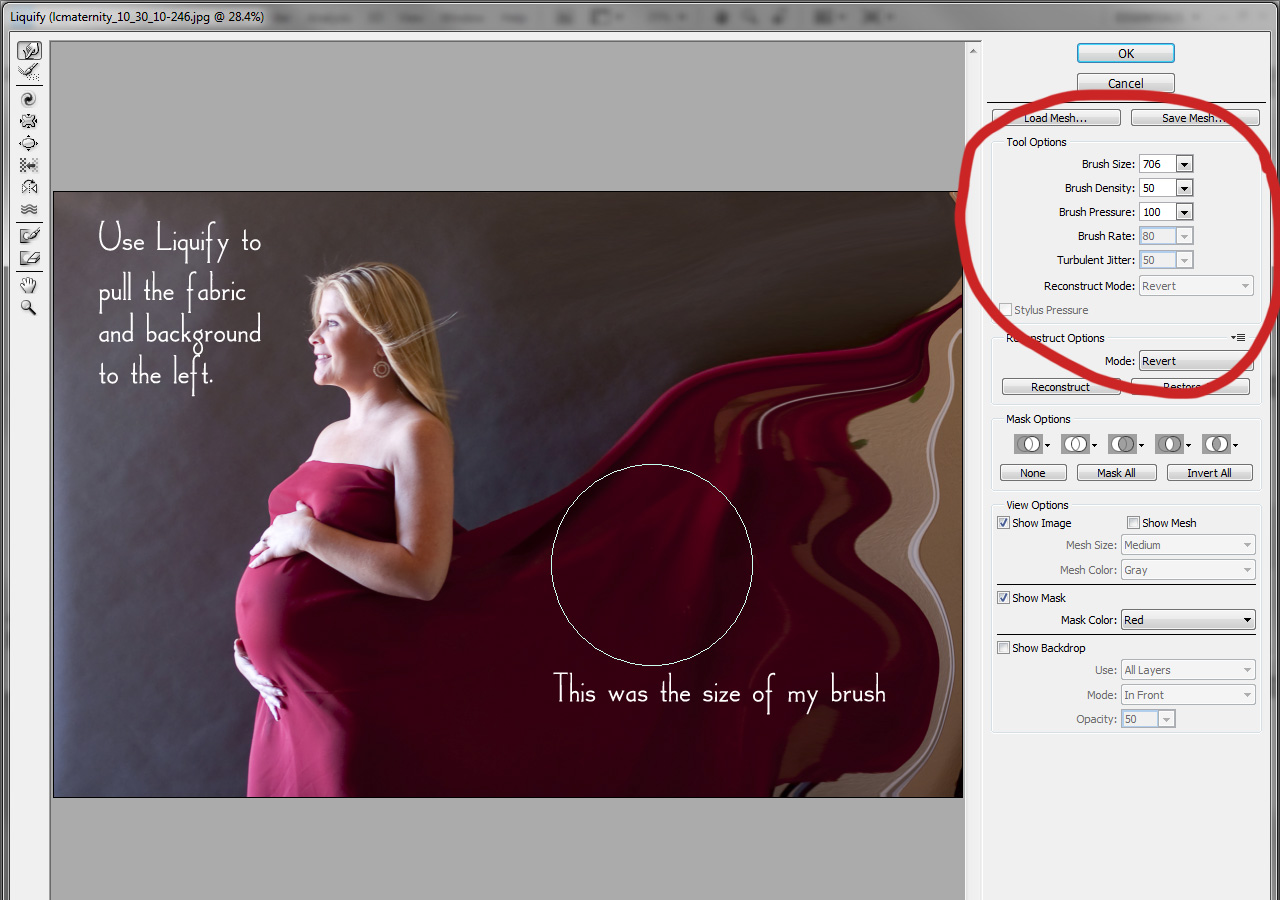
3. It may take my several attempts in liquify to get the fabric to look natural. This is not tedious, so feel free to just start over from scratch if it isn't looking right. Remember to keep the fabric flowing in a it's natural direction. Once you are finished liquifying, it should roughly look like this.
Once you finish liquifying, you will see areas on your backdrop where the image looks "pulled". Use your clone tool (stamper) or your heal tool (bandaid) to blend those areas. You don't want it to appear obvious. I may also use the blur tool to soften those areas.
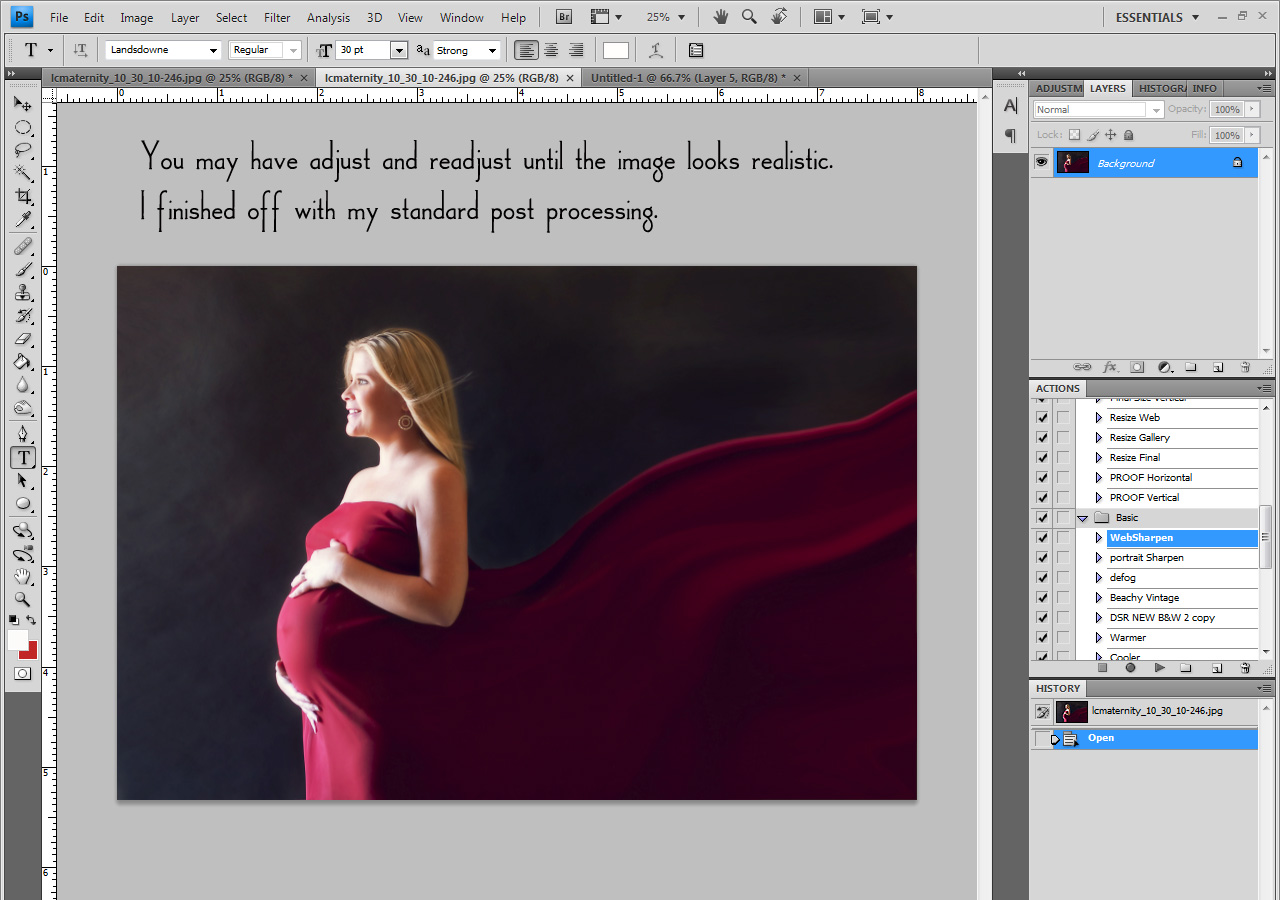
4. I finished the image with my standard post processing. I did use portraiture at 60% and I also burned the background using layer masks so that the "pulling" I mentioned above wasn't as obvious.
The Before & After!
Have fun!
